Thursday, October 31, 2013

DIY Weekend 10/31 + Chevron Infinity Scarf Giveaway Winner!

Happy Thursday!

Welcome back to DIY Weekend!

Before we dive into DIY Weekend, I'd like to take a moment and congratulate Jennifer Rae for winning our 200th Order Celebration Giveaway! Jennifer won this adorable gray chevron infinity scarf from Pick Your Plum.


Now then, back to DIY Weekend! What is DIY Weekend? Every Thursday, I host this link party to showcase my top three DIY project picks from last week's link up party and give you a chance to show off your latest projects. You can link up just about any topic and share your tips, tricks, projects and more! If you don’t have a blog to link up with, take a minute to browse the links! There really are some great blogs out there with wonderful ideas. For example, our three showcase projects:


**Please note: By linking to this blog party, you are giving Mr. and Mrs. Winslett permission to use your photos and content as part of the weekly features if selected.**

All featured projects will also be pinned to my Pinterest boards. What are you waiting for then? Oh! The house rules, of course:

1.) Link up any crafts, recipes, home decor, tips, etc. but don't forget to link back here!

2.) PLEASE be sure to link to your specific post not your general blog.

3.) PLEASE visit and comment on the post before you and after you, on top of any others that catch your eye. Everyone loves comment love!

4.) And most importantly... HAVE FUN!!

 photo b92cce52-2537-4336-b4d1-0e473a1623fe_zps754d2ffb.jpg

Monday, October 28, 2013

Scrapbooking Vacations with Project Life


When I first wrote on this blog about Project Life, I expressed concerned over how you'd document vacations and incorporate them into the album. If you are scrapbooking week-by-week like I have this past year, it can be a challenge to squeeze those vacation pictures into your album. Why? First, you typically take more pictures on vacation than you would in a normal week - at least, I know I do. Second, vacations are special. They should be a little special and set apart from your usual pages. 

Now that I have scrapbooked two vacations using Project Life successfully, I'd like to share them with you and show you how I made them stand out from the rest of my 2013 album. 

Our vacation to New Orleans fell right in the middle of my album so I used a 12x12 picture to serve as my title page for my vacation layout as seen above. I used rub-on letters to put New Orleans at the top.


For my vacation spreads, I like to use a different core kit. For my normal week-to-week layouts, I use the Seafoam Core Kit, but to make my vacation spreads stand out I use the Olive Core Kit.


In my normal week-to-week layouts, I use Design A pocket pages. However, with my vacation spreads, I like to use pocket pages that allow for more pictures mixed in with my always-faithful Design A pocket pages. In addition to Design A pages, I used We R Memory Keepers pocket pages.


One last note on scrapbooking our vacation to New Orleans using Project Life - I used the Project Life Envelope Pages to store momentos like our hotel key card and brochures. 

I'll be honest that I'm not very pleased with the envelopes. They are made of sturdy, hard plastic which you think would be a good thing. However, their lack of flexibility around the D-rings makes flipping through the album kind of tricky. The envelopes like to catch on the rings and causing them to pop open easily. I haven't tried any other brand of pocket envelopes so maybe they'll behave better. 

Biloxi/Destin Spread 1

As for our anniversary trip to Biloxi and Destin, I dug into my Olive Core Kit once again. One of the wonderful things about both the Seafoam and Olive Core Kits is they have 4x6 cards are pre-folded in half to allow for more journaling. If you take a glance at my pages, you'll notice they are more picture heavy than writing heavy because I used those folding journaling cards. 

Biloxi/Destin Spread 2
The last thing I'd like to note about scrapbooking vacations with Project Life is how I incorporated maps and brochures into our Biloxi/Destin spread. In Biloxi/Destin Spread 1 above, I used a roulette instruction card in one of my 3x4 slots. Though it isn't pictured here, I have a poker chip slid into the 3x4 slot to the left of the roulette card. In my Biloxi/Destin Spread 2, I used a map of the Destin/Fort Walton area.
   
Of course, there are a slew of different ways to document your vacation using Project Life. If you are looking for some more inspiration or another way to incorporate your vacation into Project Life, be sure to check out some of these posts I found helpful:

I love how she included the map!

Love how she broke her vacation spread into days.

Offers some great ideas and solutions for handling lots of brochures and heavy journaling

Use a memorabilia pocket for momentos

Some PLers take it with them. Here's a great tutorial on how and what to pack!
For more Project Life inspiration, be sure to follow my Pinterest board - The Project Life. Also, be sure to follow our blog:


In January 2014, I am starting a comprehensive, weekly series on Project Life. What kind of posts can you expect to see?

  • Setting Up Your Album
  • How to Build a Successful Page
  • Everything Pictures: Phone v. Camera
  • Project Life Habit: How to Keep It Up
  • Going Beyond the Core Kit
  • Pinterest, Project Life and Printables
  • Best Project Life Apps
  • Digital Project Life
That just names a few of the informative topics I will be covering throughout the series. It'll be a wonderful crash course for beginners and hopefully, have something for seasoned Project Lifers as well. 

How do you incorporate your vacations into Project Life?

Miranda


Thursday, October 24, 2013

DIY Weekend 10/24


Happy Thursday!

Welcome back to DIY Weekend!

What is DIY Weekend? Every Thursday, I host this link party to showcase my top three DIY project picks from last week's link up party and give you a chance to show off your latest projects. You can link up just about any topic and share your tips, tricks, projects and more! If you don’t have a blog to link up with, take a minute to browse the links! There really are some great blogs out there with wonderful ideas. For example, our three showcase projects above:


**Please note: By linking to this blog party, you are giving Mr. and Mrs. Winslett permission to use your photos and content as part of the weekly features if selected.**

All featured projects will also be pinned to my Pinterest boards. What are you waiting for then? Oh! The house rules, of course:

1.) Link up any crafts, recipes, home decor, tips, etc. but don't forget to link back here!

2.) PLEASE be sure to link to your specific post not your general blog.

3.) PLEASE visit and comment on the post before you and after you, on top of any others that catch your eye. Everyone loves comment love!

4.) And most importantly... HAVE FUN!!

 photo b92cce52-2537-4336-b4d1-0e473a1623fe_zps754d2ffb.jpg

Wednesday, October 23, 2013

200th Order Celebration!

PaperLark Studio received its 200th Etsy order yesterday! I am beyond thrilled and (as any Etsy seller will agree) it is a huge milestone that deserves to be celebrated. What better a way to celebrate than with a Pick Your Plum giveaway?!


Every day until Oct. 30th, you can enter to win this gray chevron infinity scarf! I've got the mint scarf and absolutely love it. Good luck!


a Rafflecopter giveaway

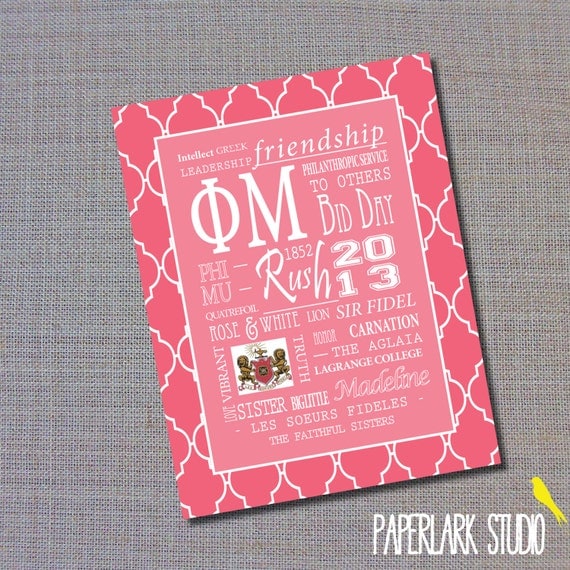
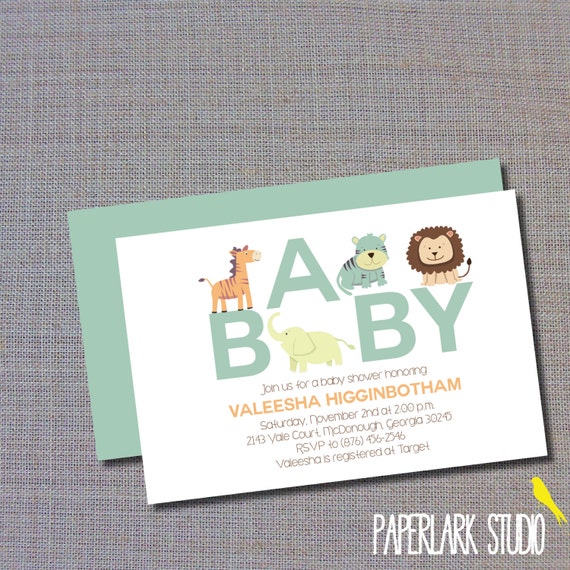
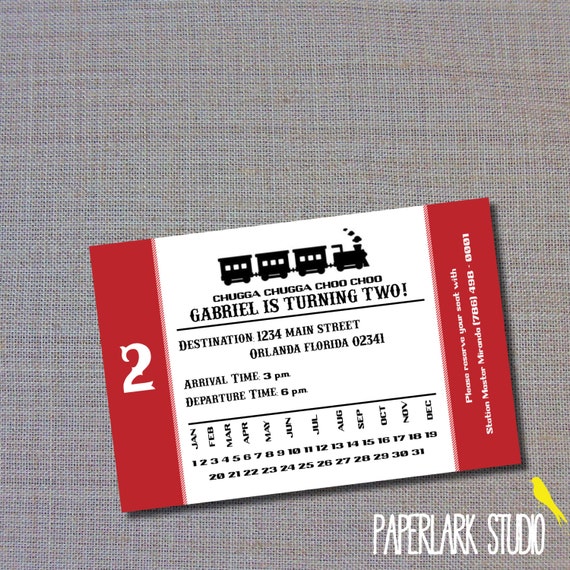
Since I haven't shared a recent post about what I've been up to at PaperLark Studio, let me give you a quick update. Here are a few of the newest additions to the shop:

Phi Mu Typography Print

Jungle Safari Zoo Baby Shower Invitation

Choo Choo Train Ticket Birthday Invitation

What's to come? I'm currently elbow deep in designing our Christmas line of greeting and photo cards. The holidays will be here before we know it!

Stay tuned and good luck!
Miranda


Monday, October 21, 2013

DIY Cardigan Onesie

For me, it has been baby shower season! I've been whipping up many baby gifts lately - including my famous five minute burp clothes which I shared last week.

All of the babies receiving these gifts so far have been boys. It's easy to find adorable clothing for baby girls, but sometimes not so much for little boys. After trip to Goodwill, blog hopping and brainstorming, I came up with the idea to make a cardigan onesie!


What You'll Need:
Onesie
Coordinating bias tape
Coordinating thread
Ruler
Marker
Sewing supplies (sewing machine, scissors, etc.)


Step One. Lay your ruler underneath both armpits and make a point in the center. From that center point to the lines of the V on the shoulder, make a line. Then, draw a line from the center point to the bottom of the onesie using the ruler. 


Step Two. Cut out your v and down to the bottom.

Step Three. Line the v with your bias tape, pin and sew. Line the right side of the onesie to the bottom with bias tape. You do not have to line the left side with bias tape because it'll overlap where the v meets. 

Step Four. Sew the bias tape onto the onesie. In some places like near the bottom buttons, I had to hand sew the bias on because my sewing machine just wasn't having it. Be sure to tuck the left side with the raw edge under the right side bias tape to sew it up. 

You can add buttons with a hot glue gun or a bow tie at the top to embellish if you wish. Here are two other great cardigan onesie tutorials that better explain how to embellish your cardigan onesie:

Adorable, right?! It's pretty easy too. 

Happy sewing!
Miranda

P.S. I purchased the onesie for this project from Goodwill for $2!


Friday, October 18, 2013

Friday's Letters

Making messes with brother

Dear husband, thank you for bringing me home cold medicine on a daily basis this week. And, I'm sorry about the nasty nose-blowing sagas you had to endure. You're a good man, Ronald Jefferson. Dear furbabies, you two make excellent napping buddies. I know ya'll enjoyed the quality time we spent together on the couch being sickly this week. Dear sickness, I don't whether you are a cold or a round of mysterious daycare-itius. You stole my voice for two days. Being a near-mute is extremely difficult and frustrating. Dear little nephew, you are going to have an awesome baby shower. Even though you'll be there in utero, I almost wish you were here in person to see the awesomeness. We're going to have a banana split bar. How is that not awesome?! Dear blog, can I just say that I'm really impressed with how well I kept up with you this week despite my mystery illness? I'm kinda feeling like a beast now.

See ya later!
Miranda

Thursday, October 17, 2013

DIY Weekend 10/17


Happy Thursday!

Welcome back to DIY Weekend!

What is DIY Weekend? Every Thursday, I host this link party to showcase my top three DIY project picks from last week's link up party and give you a chance to show off your latest projects. You can link up just about any topic and share your tips, tricks, projects and more! If you don’t have a blog to link up with, take a minute to browse the links! There really are some great blogs out there with wonderful ideas. For example, our three showcase projects above:


2. Tips for Better Baby Foot Art from Crafty Chelsea


**Please note: By linking to this blog party, you are giving Mr. and Mrs. Winslett permission to use your photos and content as part of the weekly features if selected.**

All featured projects will also be pinned to my Pinterest boards. What are you waiting for then? Oh! The house rules, of course:

1.) Link up any crafts, recipes, home decor, tips, etc. but don't forget to link back here!

2.) PLEASE be sure to link to your specific post not your general blog.

3.) PLEASE visit and comment on the post before you and after you, on top of any others that catch your eye. Everyone loves comment love!

4.) And most importantly... HAVE FUN!!

 photo b92cce52-2537-4336-b4d1-0e473a1623fe_zps754d2ffb.jpg

Wednesday, October 16, 2013

Newest Obsession: Pick Your Plum

Photo: Adorable Halloween themed pillows! I just ordered the October pillow below to add to our Halloween decor. They're only $8.99! http://bit.ly/GzA2Ou

If you are my personal friend on Facebook, you may have noticed some sporatic posts about my new shopping obsession, Pick Your Plum. Today, I wanted to share the wonder and awesomeness that is Pick Your Plum with my readers. 

What is Pick Your Plum? A website that offers two deeply-discounted deals at 7 a.m. Mountain Time (that's 9 a.m. here for me) every day. The deals will offer anything from clothing and accessories to party and crafting supplies to home decor items. 

For example, I ordered the above October pillow to add to our Halloween decor for $8.99. Every product I have purchased and received has been very high quality. I've been nothing, but satisfied with it all so far.

However, if for some crazy reason you are not satisfied or in love with your order, Pick Your Plum has a 30-day unconditional guarantee on returns - no questioned asked. 

And if that wasn't enough to sell you, then let me just say you get a piece of Laffy Taffy with your order. It's really like opening a Christmas present ya'll. 

Speaking of Christmas, I've already marked five family members off the Christmas list who will have some Pick Your Plum loot under the tree. 

Because I love Pick Your Plum, I teamed up with them as an affiliate. I promise I won't spam your Facebook feeds every day with the daily deals. I'll only share deals I love or have purchased myself - maybe one to two posts a week. 

PaperLark Studio is about to cross 200 orders -only 5 to go. When it does, I'll be celebrating by hosting an epic Pick Your Plum giveaway!

What are you waiting for? Check  Pick Your Plum out now!

Miranda

Disclaimer: I am an affiliate of Pick Your Plum and will receive compensation if you make a purchase through my tracking link. 

Tuesday, October 15, 2013

Easy DIY Burp Clothes: A Five Minute Tutorial


Pinterest is full of burp cloth tutorials. I know, because I've pinned at least half of the millions that are out there. After reading almost all of them, I've taken the differing techniques and merged them into one, very easy five minute tutorial. Of course, the five minute promise is using a sewing machine and not hand sewing. If you hand sew instead, please don't accuse me of false advertising. Ha! 

What You Need:
Patterned Fabric
Terry Cloth 
Tape Measure
Scissors
Straight Pins
Thread and Sewing Machine

Step One. Cut terry cloth and patterned fabric to desired size. I cut mine to 13x19. 
Step Two. Pin right sides together and sew leaving an 3-4 inch opening on one side.


Step Three. Trim excess around the edges and turn inside out. 
Step Four. Fold the edges of your opening in and sew closed. 


The end. Five minutes. Burp cloth.

Seriously, it's that easy! In the million tutorials, the fabrics used for the backing ranged from terry cloth like I used to chenille. Honestly, as long as the fabric is absorbent, you can use whatever. Also, in terms of the size, I also learned it doesn't really matter. I saw tutorials for 10x13, 10x18, 9x14 and more. Just stick to a rectangle of some size and you'll be set. 

The great thing about burp clothes as a gift is you can personalize them however you so chose - patterned fabric choice, embroidery, adding a label or even sewing scrap fabric hearts on top. 

You can't beat a 5 minute, homemade gift!

What do you add to your burp clothes to make them special?

Miranda