The following is a guest post I wrote for Sugar Bee Crafts which was published on Dec. 7th! I hope you enjoy!
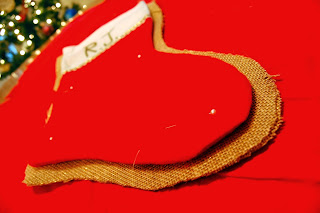
Sick of the red, felt stockings from the dollar store? Me too! That's why I made these super easy burlap Christmas stockings.
Sick of the red, felt stockings from the dollar store? Me too! That's why I made these super easy burlap Christmas stockings.
Happy Holidays! My name is Miranda and I blog over at Mr. and Mrs. Winslett. There you can find me sharing projects, tutorials, recipes and my latest Project Life pages. Be sure to stop by and follow along!

Let's get started already!
What You Need:
Burlap
Muslin
Sewing Essentials (sewing machine, scissors, straight pins, etc.)
And maybe a hot glue gun...
In the interest of keeping it real, I'll admit my first attempt at making my own Christmas stocking was a complete, epic fail.
I used a template I had pinned a while back and it just didn't work with the burlap. Why? I can't really say, but I felt the shape was just awkward.
Being wary of using another printable template from the Internet, I used my old felt stocking as a template and it worked perfectly!
Also, a quick word about how much burlap and muslin you might need - I purchased one yard of both burlap and muslin. If I had not messed up at my first attempt, I'd estimate that I could've gotten 4-5 stockings out of my burlap. As for the muslin, you'll need maybe 1 1/2 yards total because you use the muslin to make the cuff at the top of the stocking.
Woosh!
Step One. Fold the burlap in half, pin the old stocking on the burlap and cut around the old stocking leaving about 1/2 inch of seam allowance. Repeat with muslin.
[[NOTE: I advise folding the burlap in half to save you from having to cut and pin twice. Plus, the piece you cut will be identical which is crucial for a decent looking stocking!]]
Step Two. You should have two stocking shapes of burlap and two stocking shapes of muslin. Pin your two pieces of burlap together and sew leaving the top of the stocking open. Do the same with the muslin.
[[NOTE: Because of the unraveling nature of burlap, be sure to give it a full 1/2 inch seam allowance. I learned this with my epic fail stocking.]]
Step Three. Take the open top of the stocking and fold it down about half of an inch down. Pin and sew. Do this with both the muslin and burlap.
[[NOTE: Fold the muslin to the outside and the burlap to the inside as shown.]]
Step Four. Slip your muslin stocking down into your burlap stocking lining up the tops. Pin and sew.
Step Five. Cuff time! Fold your muslin in half again and lay your stocking on top of the muslin. Leaving a good inch from the stocking's sides, cut a chunky rectangle from the muslin around the stocking. My chunky rectangle was about 6 inches tall.
Step Six. Fold over the top widths of the rectangle about half an inch, pin and sew. Fold over one height end of your rectangle strip, pin and sew.
[[NOTE: Make sure when you fold over the widths that you have a straight line.]]
Step Seven. Here is where I cheat...plug up that hot glue gun and attach that cuff. After doing a couple of these stockings, I've found it easier to hot glue the cuff on instead of sewing it. Ha! To do it, glue the finished side of your cuff to the seam on the side of your burlap stocking. Continue gluing until you hit the seam on the other side of the stocking. Once you get there, let's talk about making the loop to hang your stocking.
Step Eight. Cut a strip of burlap about 4-5 inches long and 1-2 inches wide. Fold in half length-wise and sew. Fold that in half width-wise and glue together to make a loop. Glue your loop in between the stocking and the cuff on the backside seam of the stocking. If that got confusing, hopefully this picture will help.
Step Nine. More than likely, you will have some excess fabric from your cuff. It's definitely better to have excess fabric than not enough. To finish your cuff, cut off the excess fabric about 1-1 1/2 inches from the stocking. Fold it under and hot glue against the seam to close the cuff.
There you have it! One great thing about burlap is that it's pretty pliable. Therefore, you just have to play around with the burlap in your fingers to get it to hang the way you want it.
If you enjoyed this tutorial, then be sure to follow me and my blog via the social media below so you don't miss anything.
You didn't hear it from me, but there just might be a tutorial next week on a no-sew burlap tree skirt that would compliment these stocking rather nicely!
See you then!
Miranda from Mr. and Mrs. Winslett


No comments:
Post a Comment