Showing posts with label Home Decor. Show all posts

Saturday, February 1, 2014

Snow Days and Chair Cushions

The golf course at Newnan Country Club covered in snow!

We survived Snowmageddon 2014. We live just south of Atlanta and as you may know, we had an epic amount of snowfall this past week. Maybe two inches of snow isn't epic to some of you elsewhere, but to us it's pretty darn close to the second coming of Jesus.

To be fair, the area where we live got closer to four inches than two and it was beautiful! Because snow is such a rarity, I took a ridiculous amount of pictures. Some of which, I will share now.

Our house covered in four inches of snow!

We spent the week hunkered down around the fire while watching a good number of the films nominated for Oscars and eating an obscene amount of junk food. Time well-spent, right?!


Bella playing in the first inch of snow for the first time. 

I did, however, manage to complete and start some projects. The most time-consuming project was probably my chair cushions!

When we got married, the in-laws passed on their kitchen table and six chairs to us. Since then, I've always wanted to put some cushions in the chairs, but at $8 to $10 a cushion it was low on the budget priority list.

Then behold! One day, I went to work and they were replacing all of our napping mats. I took home five mats and cut the foam out of them.

I bought three yards of muslin for $1.99 a yard. I used this tutorial from Prudent Baby. I didn't embellish and make them as pretty as she did, but they will certainly do the trick! I used all of her measurements and followed the directions (relatively) closely so I'd highly recommend her tutorial.


Seriously, you can't beat $6 for six chair cushions!

Have fun creating!
Miranda


Monday, December 23, 2013

The Christmas Home Tour 2013

Merry Christmas!

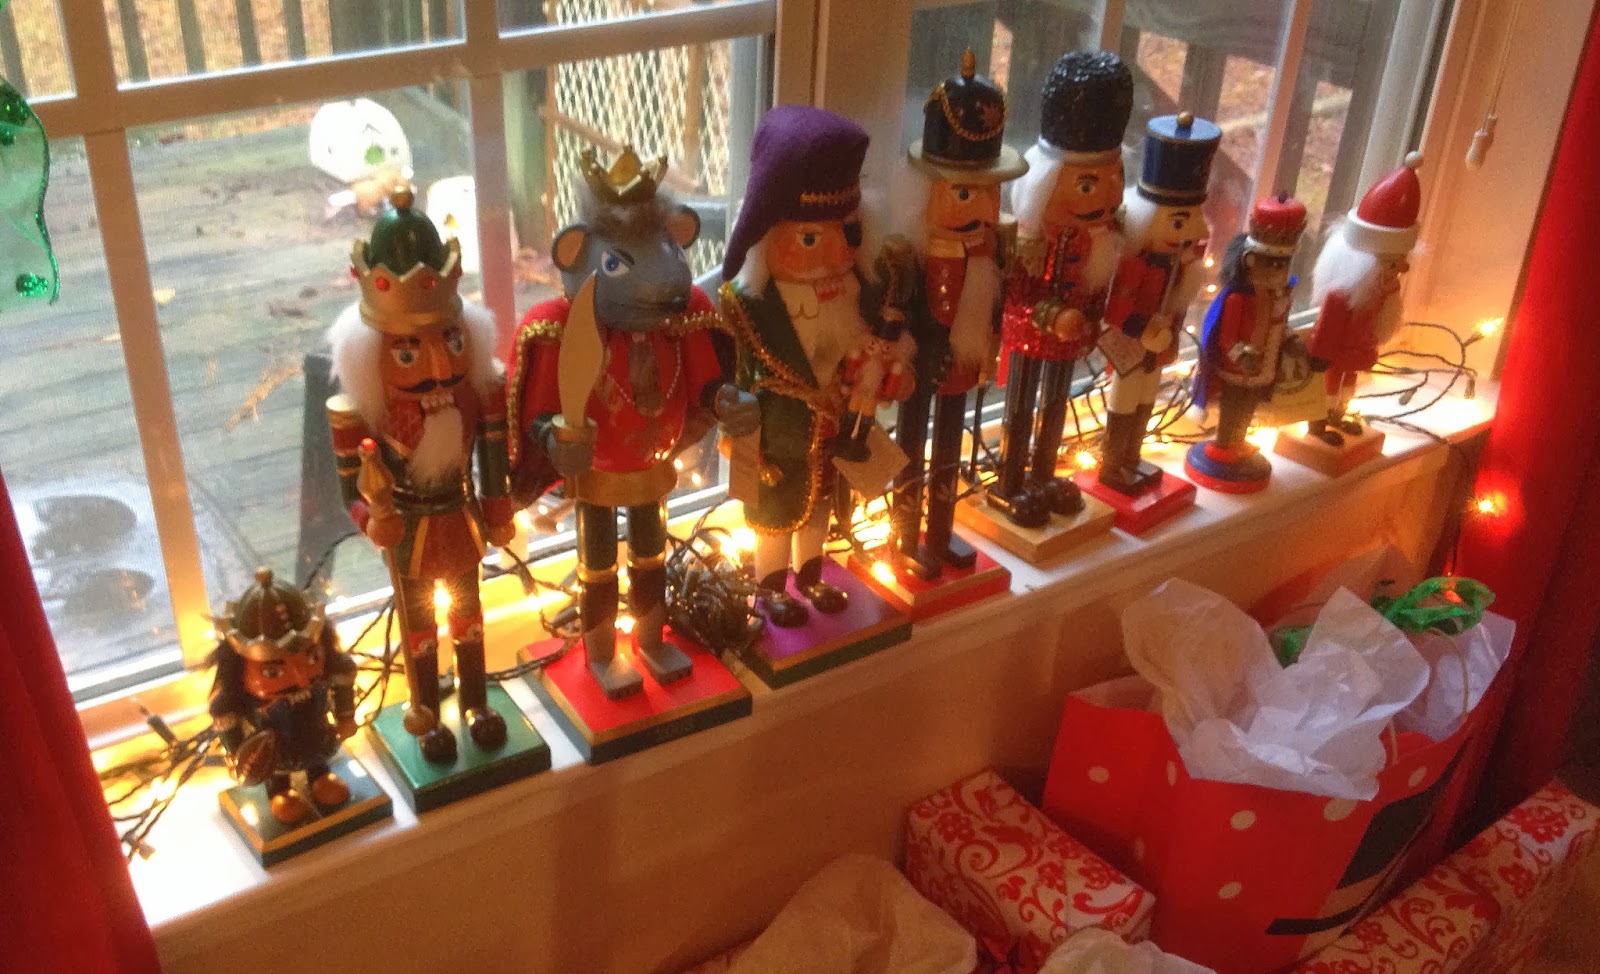
Tomorrow is Christmas Eve and I thought I'd give a little tour of our home all decorated. Seeing as this is our first Christmas in our first home, I thoroughly enjoyed decorating the house for the holidays.

When we first pulled our Christmas decor up from the basement, my husband said I had more than enough to decorate with. Once I had it all out and up though, he changed his tune saying, "I guess this house is a lot bigger than our apartment was." That said, I had all the excuse I needed to purchase some new staple decor items. Oh, how terrible, right?

I hope you enjoy the tour and happy holidays!
Miranda


Wednesday, October 16, 2013

Newest Obsession: Pick Your Plum

Photo: Adorable Halloween themed pillows! I just ordered the October pillow below to add to our Halloween decor. They're only $8.99! http://bit.ly/GzA2Ou

If you are my personal friend on Facebook, you may have noticed some sporatic posts about my new shopping obsession, Pick Your Plum. Today, I wanted to share the wonder and awesomeness that is Pick Your Plum with my readers. 

What is Pick Your Plum? A website that offers two deeply-discounted deals at 7 a.m. Mountain Time (that's 9 a.m. here for me) every day. The deals will offer anything from clothing and accessories to party and crafting supplies to home decor items. 

For example, I ordered the above October pillow to add to our Halloween decor for $8.99. Every product I have purchased and received has been very high quality. I've been nothing, but satisfied with it all so far.

However, if for some crazy reason you are not satisfied or in love with your order, Pick Your Plum has a 30-day unconditional guarantee on returns - no questioned asked. 

And if that wasn't enough to sell you, then let me just say you get a piece of Laffy Taffy with your order. It's really like opening a Christmas present ya'll. 

Speaking of Christmas, I've already marked five family members off the Christmas list who will have some Pick Your Plum loot under the tree. 

Because I love Pick Your Plum, I teamed up with them as an affiliate. I promise I won't spam your Facebook feeds every day with the daily deals. I'll only share deals I love or have purchased myself - maybe one to two posts a week. 

PaperLark Studio is about to cross 200 orders -only 5 to go. When it does, I'll be celebrating by hosting an epic Pick Your Plum giveaway!

What are you waiting for? Check  Pick Your Plum out now!

Miranda

Disclaimer: I am an affiliate of Pick Your Plum and will receive compensation if you make a purchase through my tracking link. 

Monday, October 14, 2013

My Office Makeover


The aftermath of Hurricane Me is finally cleaned up. My office is finally organized! It felt like it took forever, but it was worth it. It may not look like much from the pictures, but a lot of work went into organizing this space. If you only knew how much craft goodies I own, you'd understand.

It is morphing into a space I love. Seeing as I spend most of my time in this room, I've really invested a lot into making it mine. When we first bought the house, here is what it looked like:


It was nice and neutral, but as I posted before we even bought the house, I wanted a pale pink on the walls. I felt it would give the room a soft feminine look, making it undeniable that it was my space.  


Before taking these pictures, I considered staging my office space a bit more by putting fresh flowers on the desk and hiding the objects that didn't match my poppy pink + pale pink + gold scheme. However, I decided it would be cheating my office out of what it really is - a work space. This is where PaperLark Studio lives and thrives. This is where the posts you read on this blog are written and given life. 

When I'm working, is my desk covered with pink hydrangeas and gold office supplies? Heck no! It's covered in order forms and business receipts with pens scattered everywhere. That's not say I didn't clean it up for ya'll though! It's just a real, functioning work space which is now organized. 


Let me share how I did it!

My desk is the Expedit Workstation from Ikea. I absolutely love it! It's not only home to my computer and office supplies, but also houses my Project Life supplies. All of which are appropriately labeled, of course! 

What editions do I own? Currently, I'm using the Seafoam Edition for my 2013 album you see here. I use the Olive Edition for special vacation pages and am saving that Midnight Edition which I got on sale for our 2014 album.  


Can I just say spray paint is amazing? My file rack and desk caddy were black until a $3 can of metallic gold spray paint rocked my world. If I could have spray painted my computer, I probably would have.

A closer look at the storage beside the desk:


The magazine and copy paper holders are also from Ikea. I've had these since college and they've held up pretty decent. The labels are from Tickled Peach Studio and are free! You can find them here. If there wasn't a pre-made label for what I needed, I used my labeler to print one out. 

Once again, the gold spray paint scores another victory for its revamp of my hot glue gun container. 


Where did this container come from? BJ's. It's the container my Cascade dish washing pellets came in. Ha!


All I did was remove the stickers with some Goo Gone and spray painted that sucker. Now, it houses my glue gun and an abundance of glue sticks. 


I organized a lot of my craft goodies into this rolling plastic drawer thing which I have also had since college. You can find these at Walmart. I also had a green one of these which I have since spray painted white. Today, it houses my fabric and sewing supplies in the sewing corner of my office (which is not yet complete). Once again, spray paint wins. 

I love the wheels on it because I can pull it to where ever I am in the room working. The categories I have on it are: Stamps and Adhesives, Craft Supplies and Stencils and Paint. 

 Above my desk, is my inspiration board.


 In my opinion, every office or craft room should have an inspiration board. It helps me to stay focused on my goals, reminds me of high points in the past and where I want to be going. Not to mention, who doesn't want a picture of a cute, little puppy poking out of a box to look at while you're working?!

On the opposite wall of my desk, I have an old TV stand sitting by the office door. I use it for office supply storage and of course, some craft storage. Mostly, I store my ribbon and buttons here.


Those little bottles are spray painted saline bottles. Perfect for holding buttons ya'll. I would say something about how awesome spray paint is, but...you get the idea!


Bella would be very unhappy with me if I did not share her favorite spot of the office with you all. Between my desk and sewing corner, Bella has her own little napping nook complete with her pillow and favorite blanket. 


As I have said numerous times before, I have the laziest co-worker ever so I might as well embrace it, right?


I hope my little slice of office space offered some inspiration!

What does your ideal office/crafting space have in it?

Miranda


Tuesday, October 8, 2013

Displaying Your Wedding Bouquet


As many of you know, the husband and I recently celebrated our one year anniversary. For one year, my wedding bouquet has been hanging upside down from the ceiling of my mother's dining room. Ha! 

I kept my bouquet because I already knew I wanted to use it again for our anniversary pictures. (Read about it here!) 


As I mentioned in my wedding series, my grandmother assembled my bouquet as well as all of the flower arrangements for my wedding. (Read about that here!) That said, my bouquet was very special to me and something I really wanted to keep. 


However, after a year, it was obviously falling apart every time it was touched. Naturally, I scoured Pinterest for an idea, only to turn up nothing. Time to get creative!

I used a shadow box and a some scissors to disassemble the bouquet. As I cut the flowers one by one, I laid them face down on the shadow box glass, arranging until I was satisfied. After getting all the flowers perfect, I placed the ribbon from my original bouquet on top of the flowers letting it play peek-a-boo in the background.


My wedding bouquet is now displayed in our master bedroom. I'm pretty sure Granny would approve too!

What did you do with your wedding bouquet?

Miranda


Tuesday, September 24, 2013

Free Fall Printable

Happy Fall Ya'll!

I've been working on some fall-inspired Project Life cards which I'm hoping to share with you all next week. However, I thought I'd share a free printable with you today which is inspired by my soon-to-be-posted fall Project Life cards!


I know what you are wondering right now...will the Project Life cards be free? YES! See, good things come to those who wait!

Until then, I hope you all enjoy the free fall printable.

Miranda

This post was linked at:


Monday, September 23, 2013

DIY Framed Burlap Monogram


In our living room, I'm trying to incorporate some burlap into the decor. I'm just really digging the burlap fad right now and plan on embracing it as long as socially acceptable.

There for a while I saw this pin every time I was on Pinterest. Chances are, you have too!

http://media-cache-ec3.pinimg.com/736x/65/f1/c6/65f1c6dfe1f623822e588d8170ac7c6d.jpg

We have a fairly large photo gallery display on one of the walls in our living room. I was left with a frame that was pictureless so I thought this would be a good addition to the gallery.

However, to my dismay, I could not find the original source for the pin. Time to get creative. I researched some tutorials on how to print on burlap. I altered them slightly to fit my needs and this is the result:


This project was so simple and easy to do. Seriously, it probably took me 15 minutes start to finish. Ready for the tutorial? 

What You Need:
Burlap
Printer
Cardstock
Spray Adhesive
Scissors

Step One. Cut the cardstock to the size of your frame. (Mine was a 5x7) Spray the adhesive on one side of the cardstock. Lay the sticky, adhesive side on the burlap. Cut around your cardstock.


Step Two. Stick your burlap paper in the printer. Make sure you've got it facing the right way for your printer. 

Step Three. Open your word processing software like Microsoft Word, Adobe Illustrator, InDesign, etc. (I used InDesign) Using your word processor, format your monogram.

Step Four. Print out your monogram. Remember to format the printer settings to the size of your paper in your program. 

Step Five. Peel off that cardstock, stick that burlap in the frame and there you have it folks!


During my research, I did run across some tutorials that used freezer paper as the adhesive element. However, I had spray adhesive in my supplies not freezer paper so...yeah! 

Keep Crafting!
Miranda


This post was linked at:


Monday, September 16, 2013

Increase Curb Appeal By Spray Painting Your Shutters


Like I've said before, the outside of our house was in need of a little TLC when we bought it...clearly.


Notice the missing shutter? Yeah...Thankfully, I found it buried under some pine straw on the side of the house. After cleaning the gutters and pressure washing the vinyl siding until it looked new again, the shutters were looking very sun-worn. 

I looked up the price for new green shutters. It was a little more than $50 for a pack of two. Are you kidding me?! To buy new shutters, we'd have to fork over $200. I wanted pretty, new shutters, but not for $200!

I was complaining to my mom about paying for new shutters when she suggested I spray paint the old ones. Talk about a DUH moment. 

I can't tell you how easy this project was and how much better it makes our home look. Not to mention, the whole project only cost $37.52 which is a darn far cry from $200. 

I think they turned out pretty good if I do say so myself!

What You Need (for 8 shutters)
6 cans of exterior spray paint 
2 packs of shutter pins (found on aisle with shutters)
Washcloth
Ladder
Hammer


Step One. Shimmy up on that ladder and pull those babies off the house. You may need the backside of the hammer to wiggle the stubborn shutter pins. 

A Word to the Wise: Check under and around your shutters for any stinging, flying insect nests. Otherwise, you'll get a nasty and painful surprise. 


Step Two. Wipe down your shutters really well with a washcloth. We don't want to waste spray paint on cobwebs! Let them dry. I lined mine up on some trees in the back yard.

Shutter halfway painted with the first coat. See the difference already?
Step Three. Spray paint time! I did two coats on each shutter. Leave them overnight to dry really well. 

Step Four. Time to hang them up. Get back on the ladder and follow the instructions on the shutter pin package to hang them up. In all honesty, you just have to shove/push/hammer in the pins. Easy!

My half naked house. Shutters on the right already done!


Once you get them all up, you've got updated shutters and enhanced your curb appeal for UNDER $40!


What are some ways you enhanced your home's curb appeal?

Enjoy!
Miranda


Tuesday, September 3, 2013

Halloween Wreath for Our Front Door


Happy Tuesday!

I hope you enjoyed your long weekend as much as I did. I love long weekends because they give me some free time to craft. However, I did not have much of a crafting budget this week. We paid for husband's class, my monthly student loan bill and the mortgage this week.

Super tight budget + Overwhelming urge to create = Challenge accepted! 

I created a Halloween wreath for the front door for a grand total of $5.58 (and that's including tax ya'll). It is officially September so it is socially acceptable to start decorating for Halloween, right?!

Please ignore my arm reflecting in the glass of the door...
Being the craft supply hoarder that I am, I had most of the items for this project on hand like the paint and ribbon. All I had to buy where the letters which I got from Hobby Lobby for $1.74 each. 


Ready to try your hand at it? Here's what you need:
  • Letters
  • Black acrylic paint
  • Orange acrylic paint
  • Orange ribbon
  • Q-tips
  • Paper plate
  • Hot glue gun
  • Scissors
Step One. Paint all three of your letters black and let dry. It only took one coat for me to cover the letters completely.


Step Two. Once dry, squirt your orange paint on a paper plate and using your Q-tip, paint free-handed polka dots on your letters. Again, let the dots dry.

I promise that's not yellow paint...
Step Three. Once the letters are completely dry, tie them together using your orange ribbon. I was worried about the ribbon wiggling lose because I just tied it into a bow so I hot glued the back of the ribbon to the back of the letter.


Step Four. Secure the top ribbon that'll go on your wreath hanger with some hot glue. Once the hot glue has had time to dry and set, place that sucker on your front door.


I can't wait to get some pumpkins and some more mums to really bring my Halloween/fall front porch to life. Until then, Tilbolt, our garden gnome, will have to suffice. 


Happy creating!
Miranda