Showing posts with label Pinterest Test. Show all posts

Monday, November 4, 2013

Jungle/Safari Themed Baby Shower with FREE PRINTABLES


This past Saturday, we celebrated the pending arrival of my nephew, Elijah! The baby shower was hosted by myself and my sister-in-law, Amanda. We decided to go with the jungle theme that our mommy-to-be had selected for his nursery.

I apologize in advance for the crap-tastic pictures. Between all the chaos and excitement, I completely spaced and left the camera at home. The result? iPhone pictures. Eww. I did the best I could, but they definitely don't give it justice!

Anyway, we tried to use the same colors that were in little Elijah's bedding - jungle green, pale yellow and brown.

I designed two invitation choices for our mommy-to-be to choose from. The second was the winner! (Both of these are available for purchase in my Etsy shop here and here.)
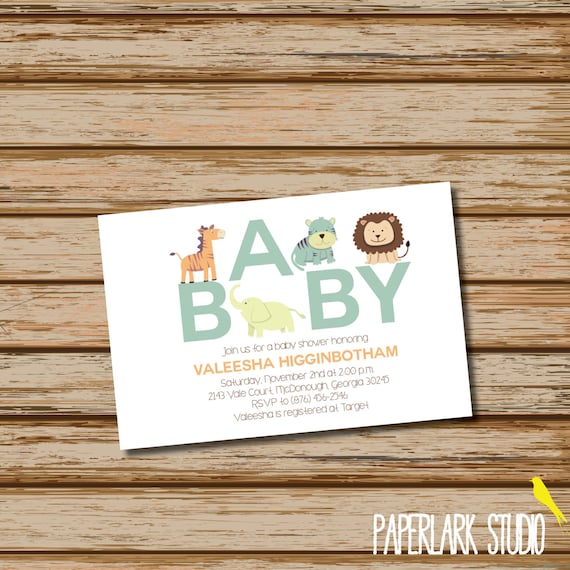
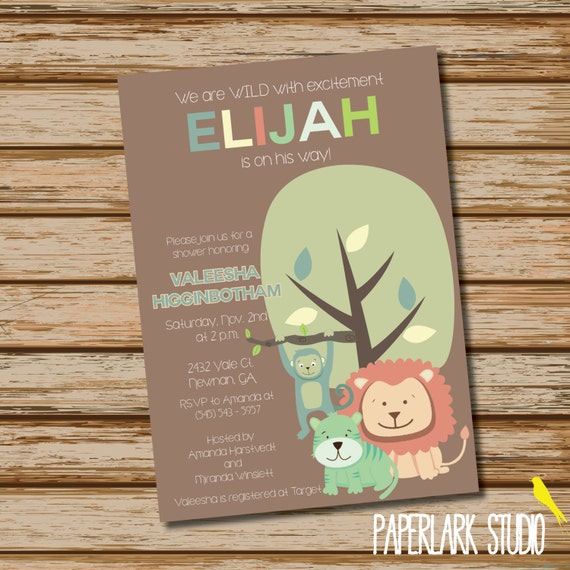
Jungle Safari Zoo Baby Shower Invitation

Jungle Safari Zoo Baby Shower Invitation

Aren't the animals adorable? I used them throughout the shower in the signs for the favors and banana split bar. 

That's right! No rumble in the jungle is complete without a banana split bar. We used real, glass ice cream dishes and offered up every type of topping you could ever want.


Would you like a free download of the sign for the banana split bar? 


You'll notice the tissue pom poms adding some color behind the banana split bar. I absolutely love these. They are my go-to party decor item now. But, please whatever you do, do not pay $5 for one at the store. They are SO easy and quick to make. Seriously, the tissue paper I used was only $1!


What You Need
A pack of tissue paper (8-10 sheets)
Twine
Scissors

Step One. Starting at the short end, fold the tissue paper 1.5 inch wide in an accordion-style.
Step Two. Cut off a piece of your twine and tie around the middle of your folded tissue paper. 
Step Three. Take your scissors and cut a point or round it.
Step Four. Carefully pull each piece of tissue paper down, away from the rest - fluffing your pom pom as you go. Do this until you have a full, fluffy pom pom. 

Looking for another excellent tutorial on how to make pom poms? Check out this one by Design Dazzle.

The mantel was definitely my favorite part of the baby shower decoration-wise. I had this big, grand plan in my head and for once, it worked exactly like I wanted it to!


I purchased some chipboard letters at Hobby Lobby and painted them using our color scheme. Not only were they a cute addition to my mantel masterpiece, but they can now be used in little E's nursery! 

Using some of the twine, I hung up three onesies that had jungle animals on them with green, glittery clothes pins. I taped some vine greenery to hide the twine and placed a stuffed giraffe and lion Amanda had found over the tape that hung the twine. 

Amanda also had the most adorable diaper cake made which topped the mantel off perfectly!


As for the favors, we gave party guests animal crackers!


The favors are sitting on top of a baby dresser that my sister-in-law, Amanda,  painted for Elijah. I absolutely loved the color she used and it worked perfectly to display our favors.

Would you like a free download of the sign for the favor table?


 I was really pleased with how well everything turned out. Not to mention, we had ALOT of fun celebrating Elijah's pending arrival and seeing all of his tiny little presents.


I can't wait to meet my little nephew now that he has been thrown a proper shin-dig!

Miranda


Monday, September 30, 2013

The Pinterest Challenge for Bloggers


Can you believe tomorrow is the first day of October?

For some reason, I always like to do a challenge during the month of October. Maybe it is because I feel like October is the longest month of the year. For example, last year I challenged myself to a month of organizing our little bitty apartment which led to an organized linen closet, kitchen sink and master bedroom closet. (I apologize in advance for the terrible pictures. What was I thinking?!)
What is the challenge this year? The Pinterest Challenge for Bloggers!

My goal is to reach 500 Pinterest followers by October 31st! I am at 253 at the time of this writing. That means I have to gain 247 followers in 30 days! I know, I know. October has 31 days. However, I like round numbers and who doesn't want an extra cheat day?!

The plan? Search and pin 10 items that appeal to me for 30 days straight. Also, I will pick three fellow pinners each day whose boards interest me to follow for 30 days straight.

Did you catch this post late? No problem. Just start today or tomorrow and go through the challenge for 30 days straight.

Of course, you do not have to be a blogger in order to the Pinterest Challenge! If you simply want to increase your Pinterest audience, you are more than welcome to join us.

That said, I challenge bloggers and non-bloggers alike to join me in this quest for Pinterest followers! A great way to start is linking up your Pinterest profile at the party below.

I'd also love to hear if you are doing the Pinterest Challenge with me and how it's going for you.


I'll even make you a deal! If you link up below and follow me, I'll follow you back and leave ya some love!

Do you have any tips or suggestions for increasing Pinterest Followers?


Wednesday, February 27, 2013

Poppy, Pale Pink and Glitter Gold

Happy Wednesday!

Honestly, it feels like it should be Friday to me, but I'll settle for Wednesday. To take my mind off of all the craziness of the past week, I've been day-dreaming of my future office/craft room in my future home. I've already decided on a color scheme:

poppy, pale pink + gold
Poppy + Pale Pink + Glitter Gold
While it may not be everyone's cup of tea, I'm in love with it. I've been contemplating throwing in a mint or emerald green as an accent color. Naturally, I've been hording ideas for my new space on Pinterest. Here's a few inspiration pictures I've gathered thus far:


Can we PLEASE move already?! I need this. Haha!

Until next time,
Miranda 


Wednesday, February 13, 2013

Pinterest Test: Philly Cheesesteak Bell Peppers


Greetings!

Last night, hubby and I tried out the Philly Cheesesteak Bell Peppers I pinned a few weeks ago. I pinned the recipe when it crossed my feed because Philly Cheesesteak's are one of hubby's favorites. 

Here's the recipe:

 INGREDIENTS
8 oz. Thinly Sliced Roast Beef
8 Slices Provolone Cheese
2 Large Green Bell Peppers
1 Medium Sweet Onion
6 oz. Baby Bella Mushrooms
2 Tbs. Butter
2 Tbs. Olive Oil
1 Tbs. Garlic – Minced
Salt and Pepper – to taste
(2 Tbs. Peace and Love)

DIRECTIONS
Slice peppers in half lengthwise, remove ribs and seeds.

Slice onions and mushrooms.  Saute over medium heat with butter, olive oil, minced garlic and a little salt and pepper.  Saute until onions and mushroom are nice and caramelized.  About 25-30 minutes.

Preheat oven to 400*

Slice roast beef into thin strips and add to the onion/mushroom mixture.  Allow to cook 5-10 minutes

Line the inside of each pepper with a slice of provolone cheese. 

Fill each pepper with meat mixture until they are nearly overflowing.

Top each pepper with another slice of provolone cheese.

Bake for 15-20 minutes until the cheese on top is golden brown. 

Serve and Enjoy!!

Makes 4 servings –  6 net carbs per serving 

Many thanks to Kyndra over at Peace, Love and Low Carb for this DELICIOUS recipe. R.J. and I both loved it and agreed to add it to our recipe repertoire. Next time, we are going to try this recipe with some bacon sprinkled on top - per hubby's suggestion. 

Enjoy!
Miranda


Wednesday, January 9, 2013

Freezer Meals 101


Greetings readers!

I thought I'd share with you a little experiment I did during the month of December. 

Truth be told I am not much of a cook. It isn't that I can't cook - I just really don't like too. I love eating the food, but not necessarily putting in the elbow grease to make the food. For some, half the fun of eating is the cooking. Me? Not so much. 

After some reflection, the fact that I don't like to cook probably contributes to our frequent eating out (which was killing our budget!). After chasing around 13 two-year-olds, writing awesome blog posts and knocking out some Etsy orders, the last thing I want to do with my time is cook. 

Last month, I experimented with doing freezer meals which entails a three to four hour cooking marathon. The cooking marathon leaves you with approximately a month's worth of meals ready to be popped in the oven. If you don't like the chore, you might as well do it once and get the pain over with, right? 

For us, it worked wonderfully! I filled our chest freezer with: homemade spaghetti sauce, chicken and bean chili, this beefaroni stuff, BBQ chicken, meatloaves and chicken spaghetti. All I had to do was thaw it, throw it in oven for a few minutes and open a can of beans to go with it. Now, that's what I call cooking!

I haven't actually done a cooking marathon for this month because we STILL have leftover meals from December. Because of the holidays, we didn't eat at home every night. 

We definitely have picked out a few favorite recipes which I'd like to share with you.

Chicken Spaghetti (2 - 8x8 casseroles)
4 chicken breasts - boiled & shredded2 cans cream of mushroom soup1 green bell pepper, diced1 onion, diced4oz jar of pimentos, diced3C thin spaghetti, broken into small pieces2C shredded cheese1 tsp seasoned salt1/8 tsp cayennesalt & pepper to taste
Boil chicken, keep 2C of broth. Cook spaghetti in the remaining broth. In a large bowl, mix all the ingredients together. Mix in the saved chicken broth gradually. You want the mixture to be creamy, slightly soupy, but not drippy. Press into pans and top with more cheese. Wrap in foil.Reheating - Thaw casserole. Remove foil & place back in baking dish. Cook at 350 for 45m.
1C chopped zucchini
1/2C chopped onion
1-1/2lbs Italian sausage
3 garlic cloves, pressed
26oz jar spaghetti sauce
30oz beef broth
1C water
1-1/2C uncooked pasta (egg noodles, radiatore, ziti work well)
basil
Chop zucchini & set aside (I cut it in slices and then cut the slices in half but I like bigger chunks). Cook sausage until no longer pink, add onions & garlic. Add spaghetti sauce, broth & water - bring to a boil. Stir in zucchini, cook 2-4 minutes until tender, add basil.
Chop zucchini & set aside (I cut it in slices and then cut the slices in half but I like bigger chunks). Cook sausage until no longer pink, add onions & garlic. Add spaghetti sauce, broth & water - bring to a boil. Stir in zucchini, cook 2-4 minutes unt
il tender, add basil.


Lazy Lasagna Chili (made 3 - 4C bags)

For more recipes, click here!

It's safe to say freezer meals have found a place in both my freezer and my heart. As I run across more delicious recipes, I'll be sure to share the love!

Until next time!
Miranda


Sunday, December 2, 2012

The 12 Dates of Christmas: Christmas Ornaments


Welcome to our next date of the 12 Dates of Christmas! (If you missed the last one, don't worry! You can read it here.)

One evening after work, we both decided to unwind and spend time together on a 12 Dates of Christmas date. Our date of choice? Making Christmas ornaments!

I saw the idea for the first ornament on Pinterest and found a recipe to use with ingredients I already had. (You can find the recipe here.) When I saw the paw print impression ornament someone had done with their pooch, I really wanted to do one with Bentley! Surprisingly, he was really cooperative. 


I had some dough left over, so we got creative and made an ornament out of the impression of our wedding rings.  


We stuck them in the oven for about 20 minutes. While we waited, we made our last ornament together.


Our last ornament started a new tradition for our little family. I bought a simple, glass ball ornament and using a Sharpie, together we wrote our favorite memories from the past year onto the ball. 


Under each memory, I wrote the date so we can remember it for the future. Some of our favorite memories that made it onto the ball this year were: getting engaged, getting married, graduating college and Disney World! It was really wonderful to sit down together and talk about happy memories. This year has presented its fair share of challenges so it was nice to reflect on the positive and reminisce. Not to mention, it provided us with a good dose of laughter when remembering some things. We had so much fun doing it we'd like to make it a tradition to do every year. 

Curious to know how the other two ornaments turned out? Well, take a look!

Bentley's paw print ornament

Our ring ornament. Below the rings, it reads: 09.08.12
Bentley enjoyed making his ornament, but I think that's because he thought it was a treat. I had to move it up higher and put it on the opposite side of the tree because he kept begging for it. I think I even saw him licking his lips once while staring at it like he is below.


Until next time!
Miranda


Friday, November 23, 2012

The 12 Dates of Christmas: Black Friday Shopping

Photobucket 

For our first Christmas as a married couple, R.J. and I have compiled a list of twelve Christmas-related dates to celebrate the season and enjoy the holidays together.

I can't take credit for the idea. I ran across this new tradition on Pinterest from Michelle over at Dream Home DIY. However, we've made it our own and added a few twists and turns. Here's our list of dates (in no particular order):

Date 1: Black Friday Shopping
Date 2: See a Christmas play
Date 3: Sleep under the lights and watch the "Grinch Who Stole Christmas"
Date 4: Make ornaments
Date 5: Bake holiday cookies
Date 6: Christmas light-seeing
Date 7: Christmas movie marathon
Date 8: Cook a holiday dinner
Date 9: Newnan Christmas Parade
Date 10: Paint Christmas pottery
Date 11: Make a gingerbread house
Date 12: Christmas giving

First up on our list was Black Friday shopping! I have always wanted to go Black Friday shopping. I know, I'm crazy. I finally talked R.J. into it. We racked up and saved a nice chunk of change. The first stop was at Target where we found the lengthy line below. We waited for just under an hour with my mom and sister. 

Line at Target on Thanksgiving night

We also staked out Old Navy until it opened and raided Belk's after that. We literally shopped until we dropped from 8 p.m. to 1:30 a.m. By the time we got home with our bags full of Christmas treasures, we were red-eyed and delirious.

However, after we got up Friday morning, we went back out to face the madness again! This time we ventured to Petsmart (for Bentley, of course!), Office Max and Office Depot. 

Shopping at Petsmart for the fur baby!
Will we do Black Friday next year? I'm not sure yet. If so, there will definitely be a nap between turkey eating next year!
Our Black Friday stash!


What date is next? Stick around and find out! Until then, you should definitely be looking out for my Cyber Monday post! *hint**hint* ;)

Love always,
Miranda

**Would you and your significant other like to participate in the 12 Dates of Christmas also? We'd love to have you join us! Be sure to grab a button and link back. I'd also love to see the links to your posts in the comment section. I might just feature a few of them. :) **


Wednesday, November 21, 2012

Crayons, Cards and Christmas Fever

Hello blogosphere! I have missed you. I am so sorry that I took a week-long hiatus. I know, it felt like forever.

I'm finally done working the extra hours at work. I'm not going to say it wasn't a blessing because we've got Christmas covered with the extra money I was able to pocket. As many of you know, that can be a huge relief!

Speaking of Christmas, the Winslett house is officially decked out for the holidays. I tried really really REALLY hard to wait until after Thanksgiving, but I couldn't do it. I have no will power when it comes to Christmas. I will do a post next week to showcase the festive decor I came up with this year. However, I'd like to introduce you now to the first ornament that was placed on our tree this year: Jimney Cricket! He is a special memento from our honeymoon in Walt Disney World this past September.

I'm very sorry to report that I cannot seem to find the Mickey and Minnie Mouse ornament which we also bought on our trip. I have not given up though! I'm still on the hunt for it so wish me luck.


Now then, I did manage to get a little crafty in our time apart. I work with three-year-olds at a daycare. When you are three and you are tired of scribbling all over your color sheet (and the table), you entertain yourself by snapping your crayons in half and peeling the paper off of them. The stripped and broken crayons below were annihilated in two and half months.

Lucky for these kiddos, Mrs. Miranda came to the rescue and made new multi-colored crayons. Thanks to a super easy tutorial I found on Pinterest, I had these suckers melted into new crayons in no time.


My kids had done the difficult (and most time-consuming) part for me - peeling the paper off. I bought a $4 mini cupcake tin at Kroger, sprayed each cup with vegetable oil, put my crayons in the cups and stuck it in the oven for 10 minutes at 250 degrees. After pulling them out of the oven, I found it most efficient to stick the batch in the freezer for about 30 minutes. Once you do that, the crayon slides right out of the pan.  


The kids loved them and I might have had some fun playing with them too. After Thanksgiving break, I am moving into the two-year-old room. Pray for me. Haha!


Bentley missed the blog world too. I thought you'd all enjoy seeing his furry face before we parted. So, what've you got to look forward to? Christmas crafts. Christmas decor. Christmas gifts. Oh! I can't wait!

See you then!
Miranda


Tuesday, November 13, 2012

How to Make: Salad in a Jar


As you may have been able to tell from my sporadic posts, my new job has been keeping me plenty busy. I'm working full time hours until Thanksgiving which has been an adjustment for our little family. It has meant eating a lot of crock pot dinners. It has meant R.J. having to learn how to clean to my standards - which he swears are impossible to meet. (He's just a baby) It has also meant that I have to fix two lunches for the next day instead of one for only R.J.

I'd like to share with you something that has been working out very well for us in fixing those lunches every day: Salads in a Jar!

Each week, I buy whatever pre-cut salad packs the grocery store happens to have on sale. I pull out my stash of quart-sized mason jars and fill the bottom with a squirt of salad dressing.


Next, I add a layer of vegetables on top of the salad dressing. (Note: This step is extremely important! By putting a layer of vegetables between the salad dressing and the lettuce, the lettuce will stay fresh and crisp!) To save time (which is in short supply at the moment), I buy the bags of vegetable which are already pre-cut.   

After arranging your layer of vegetables, stuff the rest of the jar with your pre-cut lettuce. Screw the lid on your mason jar and ta da! You've got salad in a jar.

Total time for me to make 10 salads in a jar from start to finish? 15 minutes. (Those pre-cut vegetables make a huge dent in this prep time for me!) Every day, I simply grabbed the jar out of the fridge and throw it into the lunchbox. Easy peasy!

And now, if you are curious as to which Christmas card won...CARD #1 will be circulating this year. Perhaps, one will land in your mailbox this holiday season. If you feel in love with one of the designs (which I hope you did!), all three will be listed in my Etsy shop tomorrow for purchase.

See ya later!
Miranda


Wednesday, October 31, 2012

Day-cation: Mercier Orchards

Fall is definitely in the air! With Thanksgiving right around the corner, a trip to North Georgia to pick apples is a must. 

My grandmother, mom and I made the two and a half hour trek to Blue Ridge last Friday. We ate lunch at the L&L Beanery Coffee Cafe and shopped around some of the afternoon in the downtown area.

My favorite shop we stopped in was Fezziwigs! I have an obsession affinity to Christmas - especially ornaments. You can ask my husband. I dragged him into EVERY Christmas shop in Disney World when we were on our honeymoon. I came home with two Disney ornaments and a Grinch ornament from Universal Studios. Also, I remind husband at least once a day that Christmas is coming in less than two months and I'm SOOOOO excited! Using superhero-strength will power, I resisted the urge to buy an ornament in Blue Ridge, but thoroughly enjoyed roaming between decorated Christmas trees and advent calendars. 

After seeing all downtown Blue Ridge and Fezziwigs had to offer, we ventured to Mercier Orchards.

We picked two bags stuffed full of Braeburn, Cameo and Pink Lady apples. I had to jump to reach many of the apples. For my mom, there was no hope in getting the higher up apples - she's shorter than I am. 

After victoriously collecting two bags of apples and nabbing a round pumpkin, we explored the orchard's store. We tried a muscadine slushy that I absolutely fell in love with! In the end, the back of our car was loaded down with apples, a pumpkin, two jugs of apple cider and two fried pies (which R.J. and I devoured before bed that night).

After wrapping up at the orchard, we drove over the Smith House in Dahlonega to eat. The Smith House serves Southern cuisine, but not in your typical restaurant-style seating. At the Smith House, you are seated at a large dinner table with other diners to eat. While it is a little bit on the pricey side, the food is good. My grandmother has decided their green beans were the best she's ever eaten. That's saying something because my grandma has had her fair share of green beans!

Now then, I said I was planning on turning my apples from the orchard into an upside-down apple pie. Sadly, I couldn't find the time (or the ingredients for that matter) to make the pie this time around. However, I did manage to whip up some delicious apple sauce! The best part about making apple sauce is 1) takes very ingredients and 2) takes no time to make. 


You ready for my recipe? I combined a few I found on Pinterest and made it my own!

Ingredients:
Six apples
A lemon
1/2 brown sugar
1 tsp. of cinnamon 
1/2 cup of water


Cut your six apples with an apple slicer and then quarter each slice. This is what will take you the longest to do. I didn't peel my apples either. Personally, I love the skin on them so I left them! However, you can certainly peel it off if that's what you'd prefer.

Of course, I had to peel some of the slices for Bentley. He loves apples - not to mention he's a good helper and that must be rewarded!


Put your quartered apples into a medium saucepan with the water, juice of a whole lemon, cinnamon and brown sugar. Stir it together to make sure each of the apple quarters are equally covered with lemon, sugar and cinnamon. Then, put your saucepan on low to medium heat and leave it WITH THE COVER ON for 45 minutes. 

Oh! And don't get so excited about making your applesauce that you forget to de-seed the lemon before you squeeze it over the apples. Oppsy!


After 45 minutes or until your apples are tender, mush the apples with a spoon and stir. TA-DA! You've got one good smelling kitchen and some scrumptious apple sauce. 

Now then, I've had some questions about when my post-wedding extravaganza will be gracing the blogosphere. To that, I can't give you a specific date, but I can tell you that I've been working steadily on getting the wedding scrapbook done. Thus, it should be soon! Yay!

See you Friday!
Miranda 


Wednesday, October 24, 2012

The Pinterest Test: Six Layer Sourdough Club

Welcome to the first (of what will hopefully be many) Pinterest Test! I'm testing all those recipes and crafts you see on Pinterest and letting you know which ones won't be a waste of your time. My first pick that passed the Pinterest Test? The Six Layer Sourdough Club from Eat at Allie's.
Looks like it came straight from Panera, right? At least, that's what I first thought when I pinned this scrumptious looking club sandwich.

I decided to test out this recipe for the husband. He eats a ham or turkey sandwich for lunch every day. His sandwiches only consist of three slices of ham or turkey, two slices of white bread and a slap of mayo. I know this, because I'm the one who assembles these lack-luster sandwiches the night before. I wanted to switch it up a little and make him a REAL sandwich and that's when I ran across this club sandwich on my Yummy-ness board on Pinterest.   

It was really easy and quick for me to make. It took me around 15 minutes from start to finish. It took me the longest to chop up all the vegetables and mix the dressing together. 


In my concoction, I had chopped tomatoes, red peppers, green peppers and onions. As for the dressing mixture, I used the same as the original recipe. 


All you have to do after all that chopping and measuring is stuff the mixture in the hollowed-out piece of bread and layer on the meat and cheese.  


 Ta-da! The vegetable and dressing mixture was enough for me to make two loafs! If you look at the original and compare it to mine, I didn't chop my vegetables up as fine, but it didn't make a bit of difference.

As for the taste, here is the text that R.J. sent me the next day during his lunch break: "Lunch was awesome!" I paired it with a spinach salad and a banana for him.


Is your tummy telling you to taste test this or what? The Six Layer Sourdough Club definitely passed the Pinterest Test! You should try it and tell me how it goes... ;)

Happy eating!
Miranda